
Begin by making the framework for the roof with six matchsticks. The two sticks at the top and the bottom will run lengthwise on the shed, and the four others will be running crosswise.

Note that the edges of the four crosswise beams (matchsticks!) should be pushed against the sides of the two lengthwise beams. Stick all the matchsticks together with wood glue.

Next make the two side walls of the shed with three matchsticks. The horizontal beam at the bottom is lying on the two vertical posts (more obvious in the pic below). You could make these sides by sticking the ends of the vertical posts onto the top of the horizontal beam, but the arrangement shown here is more stable.

Next stick two rails (cocktail sticks!) onto the two vertical beams. The sharp ends of the cocktail sticks have been snipped off before sticking them on.

I have placed the rails one cm apart here, but you could use any height interval. You could even paste the rails crooked, to make the structure look a little rickety. Stick the rails on with wood glue and leave them to dry.
Do the same for both sides.
Now use your thread to tie the rails onto the vertical beams. I use white thread because it is easy to stain it brown later with some dilute acrylic paint. This gives it a variegated appearance and a more natural look than just using brown thread.

Using thread is optional, but it makes the end result more detailed and the structure more stable. Wood glue is not very strong and sticking all the bits together can get fiddly. If you fasten the thread with secure knots, it ties the two posts together a lot more firmly than if you just stick all the bits together with glue.
Next stick the edge of one matchstick to the bottom end of one of the vertical beams. Take care to use a matchstick that is the same length as the four crosswise beams on your roof framework. Craft shop matchsticks can vary slightly in length.

Give the first crosswise beam some time to dry firmly before sticking on the second one. Trying to stick on too many matchsticks at the same time gets messy and its difficult to keep all the sticks at right angles to the others. Give the second beam some time to stick firmly as well.

It might be a good idea to make sure that the two crosswise beams on the floor are the same length as the four crosswise beams on the roof framework at this stage.

Next stick the other side wall against the two crosswise beams on the floor. Give the glue some time to dry, but don't worry too much about getting a secure bond. The final structure will rely on the rails and their joins with the beam for its stability.
Note that the two horizontal floor beams have not yet been painted. You can paint them at this stage if you want but i will leave them unpainted for now so that it will be clearer to see which beams are which in the rest of the photographs on this page.

Check at this stage that the roof framework sits squarely on the four vertical beams. Do not stick it on yet though, as the structure is still not very stable.

Now rest another rail on to the ends of the lower rails on the two side walls. Secure them in position with glue, but do not worry about getting a very secure bond. Do allow some time for the glue to dry though. Rest a second rail on to the ends of the two upper rails and secure it with glue as well.

Use thread to secure the four joins where the two rails at the back sit on the rails on the side walls. Once you have firmly secured these you will find that the four vertical beams will be firmly tied together and held up by the tension in the six rails.

All you need to do next is stick the roof framework on to the four vertical beams. I paint the thread first because it is easier to do this without having the roof stuck on. I use brown acrylic paint very dilute for the thread, and then apply some Devlan Mud to give it a dirty appearance.

You will need to use something to cover the roof of course. I will use brown wool woven together which gives the appearance of a woven hemp or reed mat. If weaving is not your thing, then just stick a number of twigs lengthwise, resting on the crossbeams.
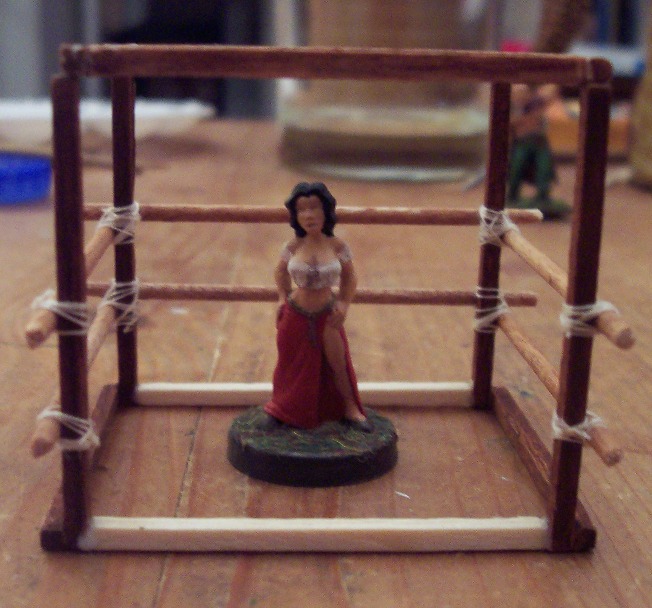 |
| "Come and get it, big boy!" |
No comments:
Post a Comment