 |
| Ancient Israelite Holemouth Jar |
Holemouth Jars were widely used for storage in ancient times. It is thought that they were used to hold things like grain, olive oil and dried fruit. Many such vessels have been found in archaeological sites in the Middle East dating to the biblical period.
These jars are especially easy to make in miniature because,
unlike other storage jars, they do not have narrow necks but only a wide
opening (which is where the name hole-mouth comes from). In some cases, the opening
can even be as wide across as the body of the jar itself.

You will need some appropriately coloured polymer clay, and a long thin instrument to mould it with. My wife uses a kitchen skewer, but any similarly shaped object can be used.

The amount of polymer clay needed depends on the size of the jar to be made. A small ball about 5 to 6 mm in diameter should make a medium-sized holemouth jar.

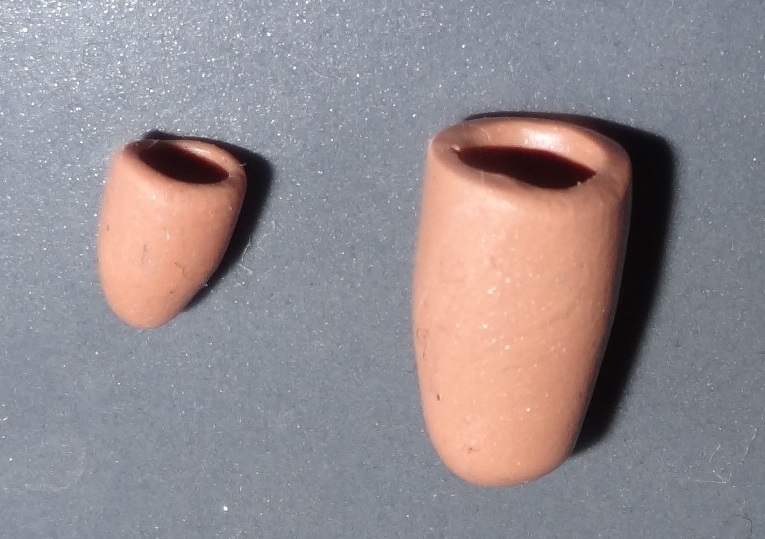
First, form the clay into the shape shown in the picture on the right. Holemouth jars came in many different shapes, and the lower end can be made more rounded or pointed as preferred.

Using the kitchen skewer (or whatever instrument you prefer) gently form the inside of the jar.

The jar can be rolled back and forth on a smooth surface to give its body a more smoothly rounded appearance.

Once the shape of its body is satisfactory, gently press the jar down on a smooth surface to give its mouth a more flattened look.
All that needs to be done now is to bake the jar in an oven , according to the instructions given by the manufacturer. We use FIMO, and bake at 120 degrees centigrade for 25 minutes.
Once they are hardened, the jars can be filled up with whatever little items you like (e.g. miniature cherries made out of polymer clay) and used in your diorama.
 |
| This little hobbit seems to have used his holemouth jar to keep sugar in...or is that whitish powder something else? |
Or, if you would rather, you can make a lid for the jar instead. Click here to see how to do this.
No comments:
Post a Comment